Sensory bins are all the rage over Pinterest right now, and for good reason. They are a great way to develop your toddler’s sensory and motor skills, and they’re just plain fun!
It’s not just for toddlers, a lot of studies have shown that these are great for Autism spectrum people and even cognitive issues in older adults like with Alzheimer’s or general dementia.
Just. Wow.
Why is sensory play important?
Sensory bin play improves children’s ability to learn limit/boundary situations (I could go on for hours, but basically a child needs to be able to tell the difference between what is harmful/dangerous and what is not)
Provides something for them to do with their hands when they need it. As many parents know, kids have a tendency to put things in their mouths and sensory play helps redirect this behavior at the same time it works on their fine motor skills.
What does DIY mean?
DIY means Do It Yourself, so DIY sensory tables are simply doing you own thing instead of buying something ready made. DIY sensory tables can be incredibly cheap and easy if you just make one out of a cardboard box or empty containers.
Other DIY sensory table options include plastic tubs, plastic crates, and wooden boxes. DIY sensory tables can literally be anything you want them to be!
What is a sensory table?
A DIY sensory table is a low, wide bin with a lot of room for kids to play and explore. Its role is similar to that of an easel; it gives them something safe to do while making messes.
Unlike an easel, however, it has a lid and doesn’t have any sharp corners or edges (sometimes DIY sensory tables are made up of multiple bins). Some DIY sensory bins are made out of several smaller bins in order to create deeper layers for your child. Depending on the number and size of your bins, there may be many different sections within your DIY sensory table.
The main reason why I recommend DIY sensory tables over store-bought ones is that they’re incredibly cheap and easy to make, especially if you use smaller, more manageable bins.
DIY sensory tables can be used inside or outside; you just need to be careful about safety and the weather so that your child doesn’t get hurt. Even if you have a small space you can put one of these together – no need to get PVC pipe and wood from your local hardware store, you can whip up a sensory bin instead!
In order to help you build a DIY sensory table that your kids will love, I’ve created this easy DIY sensory table instruction set!
Sensory Table Ideas
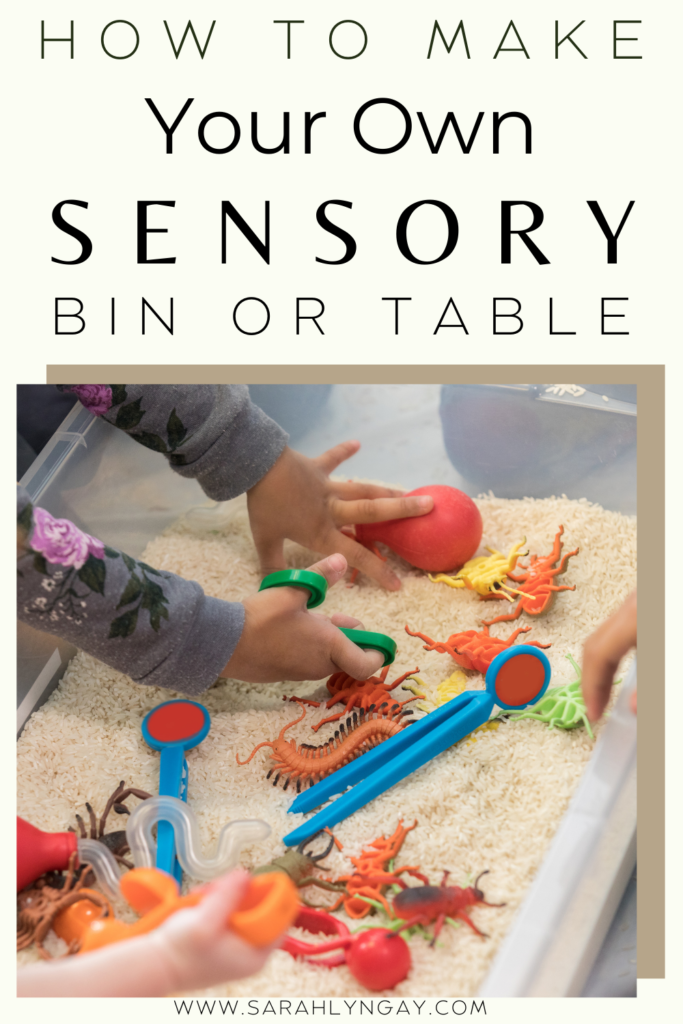
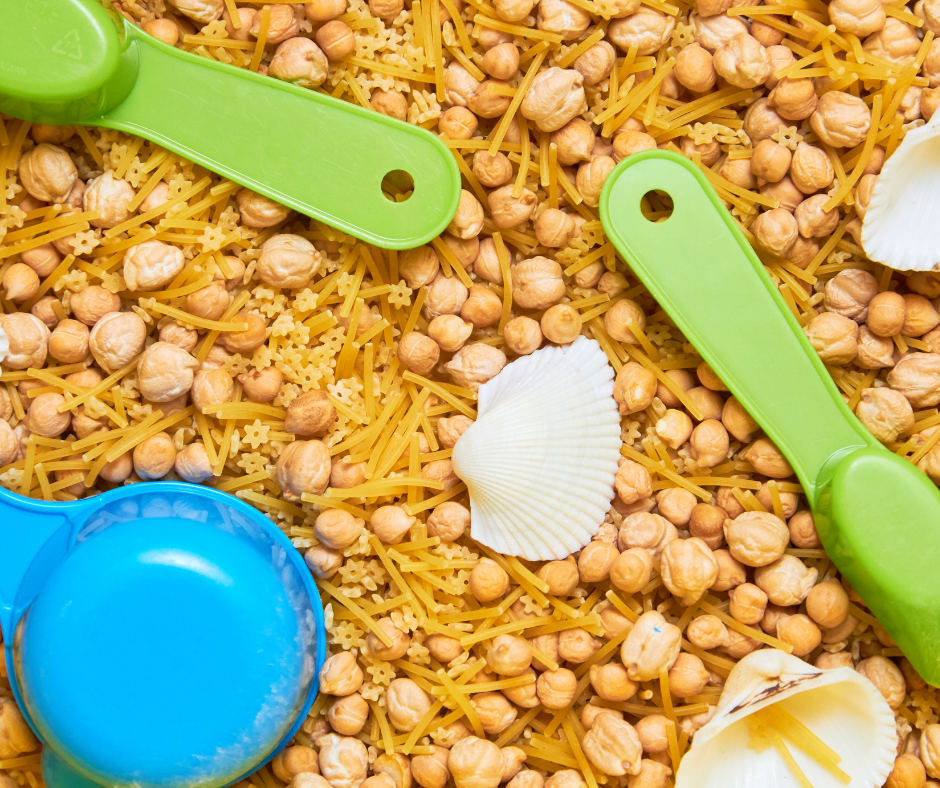
First thing’s first: what should go into my DIY Sensory table? You will find a ton of ideas if you walk around your local dollar store! Some example toys are water spray bottles, checkerboards, rice bin (lid optional), pom poms, lidless shoeboxes, balls of all kinds (bouncy balls work well), dry cereal such as Cheerios or Wheaties (lid optional), water and oil, sponges, pipe cleaners, paper towels, empty toilet roll tubes (great for storing supplies!), DIY sensory table marbles, DIY sensory table balls, and even popsicle sticks.
Look around the house for recyclable items. For example empty toilet paper tubes, dry rice or beans – great for fine motor skills, small boxes from things like mac n cheese, egg cartons that you cut up, etc. Pretty much any household item could work with adult supervision.
What if I don’t have any bins?
If you don’t have any DIY sensory tables or shoeboxes lying around your house that you’re willing to sacrifice for the sake of your child’s playtime fun, then stop reading this right now and go buy some. You will not regret it. If you just want to make do with what you already have, however, here is an alternative:
If you have one container that’s large enough and the rest are smaller containers, you can use the largest container as the DIY sensory table and the small containers as bins within it. That way there’s only one lid to worry about!
A plastic tub is fantastic and often free on Facebook groups because people lose or break the lids. Pretty much any larger storage container would work.
What should I put on top of my DIY sensory table?
A DIY sensory table doesn’t need a lid! It may be more fun without one because your child will have easier access to all the toys inside. If you do want a lid, however, find something that covers most of it apart from a small hole for easy accessibility. It will make it easier to store when playtime is over.

Try a themed sensory bin!
DIY sensory tables are great for seasonal themes! You can make DIY sensory bins for any holiday or season you like. For example, a DIY sensory table Halloween bin might include dry beans and rice in the shape of a spider body, googly eyes, spooky music with creepy sound effects (can run on a phone or computer), plastic spiders and webs, fake blood, etc.
You can easily do other themes too! DIY sensory bins for St. Patrick’s day might have DIY sensory table shamrocks (made of green pipe cleaners), DIY sensory table leprechaun hats, rainbow waterfall, etc.
You can also mix and match themes!
A DIY Easter DIY sensory bin could include DIY sensory table eggs in the colors of the rainbow waterfall, pastel pom poms or plastic beads and dry glitter on top, plastic basket-weave eggs, crumpled foil cut into the shape of chickens/bunnies/etc., a DIY egg toss blindfold game, mini books and figurines to retell the story of Easter to kids who are too young to read just yet (or older children), felt pastel Easter eggs with ribbon ties so they can hang from the DIY sensory table lid.
If you have any recyclable plastic eggs lying around your house for whatever reason, these make great DIY sensory bins! Just put some beads, glitter, or pom poms inside and the kids will enjoy shaking them around.
That’s it! Your DIY sensory table is ready to go and ready for little hands to dig into your bin of fun!
Do you still need help?
Now, if you are really stuck on bin contents for your sensory tub I have a printable for you that not only has a planner page for you to easily whip up different themes but a list of fillers as well as tools that make for great options for you to use!
Get My Free Printable Sensory Bin Planner!

See it in our store HERE: Sensory Bin, Sensory Items, Digital Download, Instant Download, Printable Download, STEM, STEM Worksheets, Sensory Issues, Kid’s Sensory Bin
I hope you can see that there is no need to go out and buy a fancy sand table or water table, you can create so much fun with just a bin that it is a budget-friendly great option. With your own design, you will come up with the best ideas that are the perfect way to entertain your budding scientist.
Just remember, there is no wrong way to do this! You can make fantastic sensory activities with any budget and the kiddos will be beyond happy! There are no exact measurements needed – that is the great thing! Enjoy all the different ways you can use sensory items for extra fun!

What Visiters Had To Say